Loom knitting is a fun and accessible craft for beginners․ With free PDF guides like Knifty Knitter and Good Knit Kisses, you can learn step-by-step basics, patterns, and projects like hats, scarves, and blankets․ These resources offer clear instructions and diagrams, making it easy to start your loom knitting journey․
What is Loom Knitting?
Loom knitting is a versatile and easy-to-learn craft that uses a tool called a loom to create knitted fabrics․ Unlike traditional knitting with needles, loom knitting involves wrapping yarn around pegs on a loom to form stitches․ This method is perfect for beginners, as it simplifies the process of creating textiles like hats, scarves, and blankets․ The loom allows for consistent tension and reduces the risk of dropped stitches, making it ideal for those new to knitting․ With various types of looms available, such as round, rectangular, and long looms, you can explore different projects and patterns․ Free PDF guides and tutorials provide step-by-step instructions, helping you master the basics and beyond․ Loom knitting is a fun and rewarding hobby that offers endless creative possibilities․
Why Choose Loom Knitting for Beginners?
Loom knitting is an excellent choice for beginners due to its simplicity and forgiving nature․ Unlike traditional knitting, which requires managing two needles, loom knitting uses a single tool with pegs, making it easier to handle․ The loom holds the stitches in place, reducing the risk of mistakes and dropped stitches․ This method is also less straining on the hands, making it accessible for those with arthritis or limited dexterity․ Additionally, free PDF guides and tutorials provide clear instructions, ensuring a smooth learning curve․ Loom knitting allows beginners to create beautiful projects quickly, boosting confidence and motivation․ Its portability and versatility make it a great hobby for crafting on the go, producing items like hats, scarves, and blankets with ease․
Understanding the Loom
A knitting loom is a tool with pegs arranged in a circle or rectangle, used to hold stitches․ It simplifies knitting, making it easy for beginners to create fabric․
Types of Looms
Knitting looms come in various shapes and sizes, catering to different projects and preferences․ The most common types include round looms, rectangular looms, and long looms․ Round looms are ideal for creating hats, sleeves, and circular items, while rectangular looms are great for scarves, blankets, and flat panels․ Long looms are perfect for making socks or long, narrow projects․ Brands like Knifty Knitter, Darice, Boye, and Loops & Threads offer versatile options for beginners․ Each loom type has a specific number of pegs, which determines the size and complexity of the project․ Choosing the right loom depends on the desired outcome and personal comfort․ Free PDF guides often include charts to help select the perfect loom for your needs․
Parts of a Knitting Loom
A knitting loom typically consists of a frame and pegs arranged in a specific pattern․ The frame holds the pegs in place, while the pegs are where the yarn is wrapped to create stitches․ Round looms have pegs arranged in a circle, ideal for circular projects, while rectangular looms feature pegs in rows for flat knitting․ Some looms include a holding peg to secure the yarn tail, and a knit hook for manipulating stitches․ The peg spacing and number vary depending on the loom type and gauge․ Understanding these parts is essential for casting on and knitting effectively․ Free PDF guides often include diagrams to help beginners identify and use each component properly, ensuring a smooth start to their loom knitting journey․
Choosing the Right Loom for Beginners
Selecting the right loom is crucial for beginners to ensure an enjoyable knitting experience․ Start with a basic round or rectangular loom, as they are versatile and easy to use․ Round looms are ideal for hats and circular projects, while rectangular looms suit scarves and flat panels․ Look for looms with evenly spaced pegs and a comfortable design․ Brands like Knifty Knitter, Darice, and Boye offer excellent options for newcomers․ Consider the number of pegs and gauge (spacing) to match your project size․ Portability and durability are also important factors․ Begin with an affordable, compact loom to practice the basics before investing in more specialized tools․ Free PDF guides often include recommendations to help you make the best choice for your first projects․
Gathering Materials
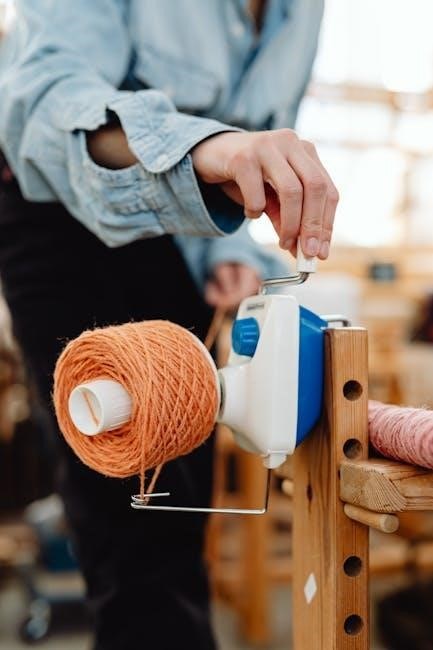
To start loom knitting, you’ll need a loom, yarn, and a knitting hook․ Choose yarn suitable for your project, and ensure you have measuring tools and accessories like scissors and tapestry needles for finishing touches․
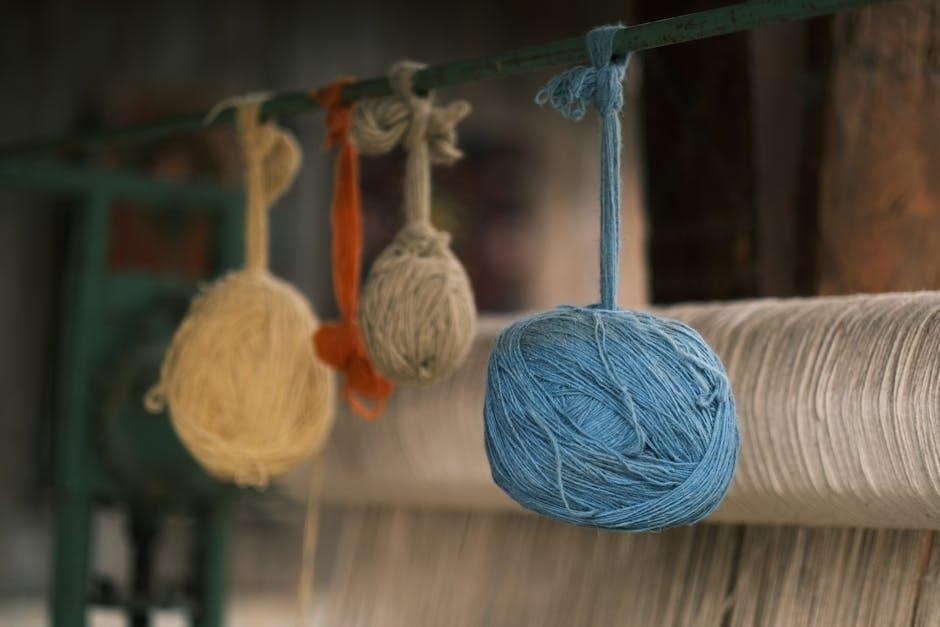
Yarn Selection for Loom Knitting
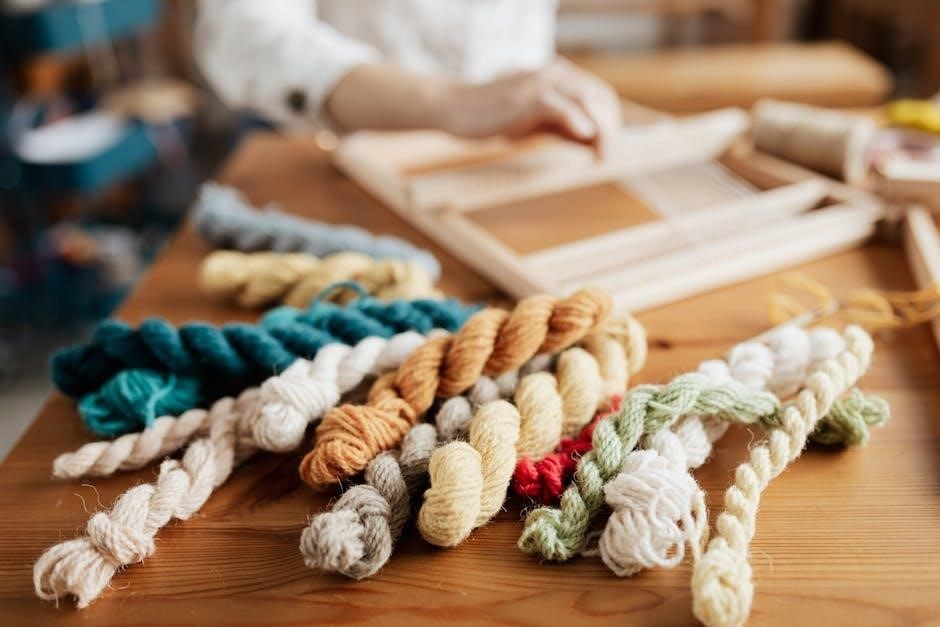
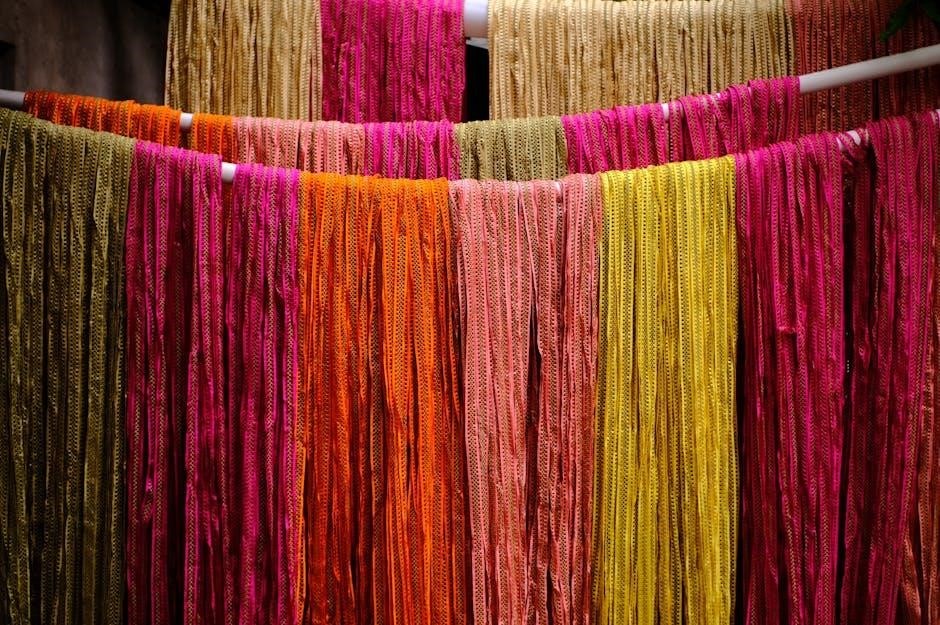
Choosing the right yarn is essential for successful loom knitting․ Acrylic yarns are ideal for beginners due to their softness, durability, and easy care․ Wool or blends are great for warmth, while cotton is perfect for spring or summer projects․ Consider the weight of the yarn—chunky yarns work quickly, while medium or fine weights offer more detail․ Always check the yarn label for gauge information to ensure it matches your loom’s settings․ Color and texture can add personality to your projects, so feel free to experiment․ For starters, medium-weight acrylic yarn is recommended for its versatility and forgiveness․ This ensures your first projects will be enjoyable and stress-free․
The Knitting Hook
The knitting hook is an essential tool for loom knitting, used to lift loops and secure stitches․ It comes in various materials, such as plastic or metal, and is designed for easy handling․ For beginners, a plastic hook is recommended for its lightweight feel and ease of use․ The hook is crucial for tasks like casting on, moving loops, and binding off․ When selecting a hook, ensure it fits comfortably in your hand to avoid fatigue․ Some hooks feature rubber grips for better control, which is especially helpful for those with arthritis or hand discomfort․ Always keep the hook near your workspace to streamline your knitting process․ Proper use of the hook ensures even tension and professional-looking results․
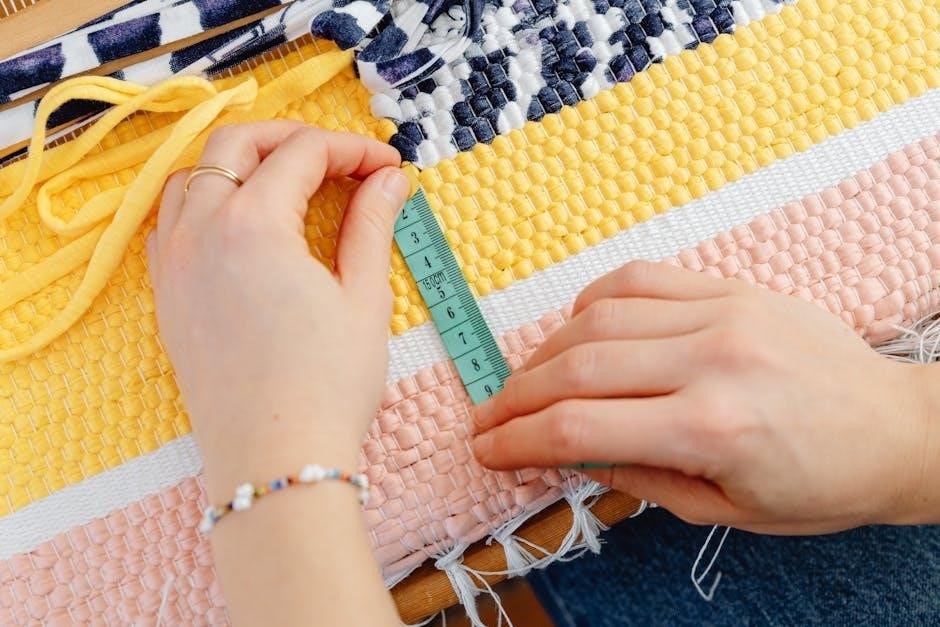
Measuring Tools and Accessories
Measuring tools and accessories are essential for ensuring accuracy and efficiency in loom knitting․ A tapestry needle is crucial for weaving in yarn ends neatly․ A measuring tape or gauge ruler helps check your work’s size and tension․ Scissors are necessary for cutting yarn, while stitch markers can help track patterns or specific stitches․ Many PDF guides, like the Knifty Knitter instructions, include tips on using these tools effectively․ Accessories like rubber grips for hooks or peg extenders can enhance comfort and control․ These small but vital items ensure your projects turn out as intended․ Always keep them organized and within reach to maintain a smooth knitting workflow․ Proper use of these tools will elevate your loom knitting experience and results․
Basic Loom Knitting Techniques
Mastering basic techniques like casting on, the E-Wrap stitch, and binding off is essential․ These foundational skills, detailed in PDF guides, help beginners create seamless projects with ease and precision, ensuring a strong start in loom knitting․
Casting On
Casting on is the first step in loom knitting․ It involves creating the starting row of stitches on the loom․ According to various PDF guides, such as the Knifty Knitter instructions, the process typically begins with tying a slip knot at the end of the yarn, leaving a small tail․ This knot is then placed on the holding peg, and the yarn is pulled to secure it․ Next, the yarn is wrapped around each peg in a counterclockwise direction, starting from the first peg to the left of the holding peg․ This method ensures even distribution of stitches and a neat starting edge․ Proper casting on is crucial as it sets the foundation for the entire project, ensuring that the fabric lies flat and the edges are smooth․ Many tutorials emphasize the importance of maintaining consistent tension during this step to prevent loose or tight stitches, which can affect the overall appearance of the finished item․ With practice, casting on becomes a quick and effortless process, allowing beginners to move on to more complex techniques with confidence․
The E-Wrap Stitch
The E-Wrap Stitch is a fundamental technique in loom knitting, often covered in beginner-friendly PDF guides like the Knifty Knitter instructions․ It involves wrapping the yarn around the peg in a counterclockwise direction, forming an “e” shape․ This stitch is ideal for beginners because it creates a smooth, elastic fabric․ To execute the E-Wrap, bring the yarn from the front of the peg to the back, then wrap it around the peg, ensuring the yarn lies flat․ This method prevents twisting and ensures even stitch formation․ Many tutorials highlight the E-Wrap as a great starting point for projects like hats and scarves․ Keeping consistent tension is key to achieving professional-looking results․ With practice, the E-Wrap Stitch becomes second nature, allowing you to explore more complex patterns effortlessly․
The Purl Stitch
The Purl Stitch is a versatile technique in loom knitting, essential for creating textured fabrics․ It is often taught in beginner-friendly PDF guides like the Knifty Knitter instructions․ To perform the Purl Stitch, wrap the yarn clockwise around the peg, starting from the back․ This creates a stitch that appears as a small bump on the fabric․ The Purl Stitch is commonly used in combination with the E-Wrap to create patterns like the Rib Stitch․ Keeping the tension even is crucial to ensure a smooth finish․ Many tutorials emphasize the Purl Stitch as a key skill for beginners, as it opens the door to more complex designs․ With practice, mastering the Purl Stitch will enhance your ability to craft a variety of loom-knitted projects․
Binding Off
Binding off is the final step in your loom knitting project․ It secures the last row of stitches to ensure your work stays intact․ To bind off, start by moving the first loop from the peg to the working yarn․ Continue this process for each peg, moving the loops one by one․ Gently tug on the yarn to tighten and secure the loops․ Once completed, your project is ready to be removed from the loom․ Free PDF guides like the Knifty Knitter instructions and Good Knit Kisses tutorials provide step-by-step visuals for mastering this technique․ Proper binding off ensures a clean finish, making your handmade items look professional․ Practice this skill to complete your projects confidently!
Stitch Patterns for Beginners
Master basic stitches like Garter, Rib, and Stockinette․ These patterns are simple, versatile, and perfect for beginners․ Free PDF guides offer clear instructions for learning them quickly․
Garter Stitch
The Garter Stitch is one of the simplest and most popular stitches in loom knitting․ It creates a textured, ridge-and-valley fabric that is both visually appealing and easy to work up․ To create a Garter Stitch, you simply knit every row without purling․ This stitch is ideal for beginners because it requires minimal technique and is forgiving of small mistakes․ It’s perfect for projects like scarves, hats, and baby blankets․ Many free PDF guides, such as those from Knifty Knitter and Good Knit Kisses, provide step-by-step instructions for mastering the Garter Stitch․ With practice, you can quickly incorporate this versatile stitch into your loom knitting repertoire․
Rib Stitch
The Rib Stitch is a versatile and popular pattern in loom knitting, ideal for creating elastic fabrics․ It involves alternating between knit and purl rows, producing a textured, stretchy design․ This stitch is perfect for beginners, as it helps develop the skill of transitioning between knit and purl stitches seamlessly․ The Rib Stitch is commonly used for projects like hats, scarves, and cuffs, where a snug fit is desired․ Many free PDF guides, such as those from Knifty Knitter and Good Knit Kisses, offer detailed instructions for mastering the Rib Stitch․ With practice, you can use this stitch to add professional finishes to your loom-knitted items, ensuring comfort and durability․
Stockinette Stitch
The Stockinette Stitch is a smooth, flat texture achieved by knitting all rows in the same direction․ It is a fundamental stitch in loom knitting, often used for garments requiring a soft drape․ To create the Stockinette Stitch, use the E-Wrap stitch for every row․ This stitch is ideal for beginners, as it requires minimal pattern changes and allows for quick completion of projects․ Many free PDF guides, such as the Knifty Knitter manual, provide step-by-step instructions for mastering the Stockinette Stitch․ It is perfect for creating scarves, hats, and baby blankets, offering a classic look that is both timeless and versatile․ With consistent practice, the Stockinette Stitch becomes a go-to technique for any loom knitting project․
Combining Stitches
Combining stitches allows you to create intricate textures and patterns in your loom knitting projects․ By alternating between Garter, Rib, and Stockinette Stitches, you can add depth and visual interest to your work․ For example, pairing Garter Stitch with Stockinette creates a balanced, reversible fabric, while mixing Rib and Garter Stitch adds a dynamic contrast․ Many free PDF guides, such as Kristen Mangus’s Loom Knitting Guide, provide detailed instructions for blending stitches seamlessly․ Experimenting with combinations is a great way to challenge yourself and expand your creative possibilities․ With practice, you can design unique and personalized projects that showcase your skill and style․ These techniques are perfect for creating versatile garments and accessories․
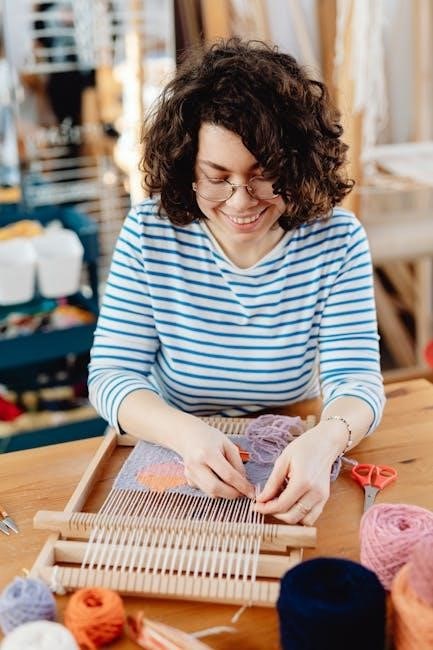
Simple Projects for Beginners
Start with easy projects like hats, scarves, and baby blankets using free PDF guides․ These projects are perfect for learning basic loom knitting skills and building confidence․
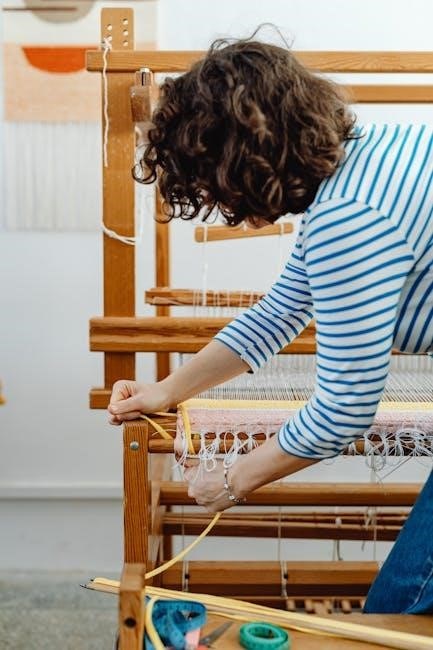
Knitting a Simple Hat
Knitting a simple hat is an excellent project for beginners․ Start by choosing a round or rectangular loom and a soft yarn․ Use free PDF guides like the Knifty Knitter manual or Good Knit Kisses tutorials for step-by-step instructions․ Begin by casting on the required number of pegs, following the pattern’s gauge․ Practice the e-wrap stitch for a basic fabric․ For a ribbed brim, alternate between knit and purl stitches․ As you knit, ensure even tension to maintain the hat’s shape․ Once completed, bind off and sew the seam․ For a perfect fit, measure your head and adjust the length․ Troubleshoot common mistakes like dropped stitches or uneven tension by referring to online forums or video tutorials․ With practice, you’ll create a cozy, personalized hat․ Start your first project today and enjoy the satisfaction of handmade knitting!
Creating a Scarf
Creating a scarf is a great way to practice loom knitting skills while making a stylish accessory․ Start by choosing a rectangular or round loom and a soft, medium-weight yarn․ Use free PDF guides like Knifty Knitter or Good Knit Kisses for step-by-step instructions․ Cast on the desired number of pegs, following the pattern’s gauge․ For a simple scarf, use the e-wrap stitch or experiment with textures like garter or rib․ Knit row by row, ensuring even tension for a smooth fabric․ Add color changes or patterns for a personalized touch․ Once completed, bind off and weave in the ends․ Scarves are versatile and forgiving, making them an ideal project for beginners to build confidence and refine their techniques․
Knitting a Baby Blanket
Knitting a baby blanket is a heartwarming project for beginners․ Use a rectangular loom to create a flat panel, perfect for a soft, cozy blanket․ Start by casting on the desired number of pegs, following a simple pattern like garter or stockinette stitch․ Choose a soft, medium-weight yarn in pastel shades or neutral tones․ Knit row by row, maintaining even tension for a smooth texture․ Once the blanket reaches the desired size, bind off neatly and weave in ends․ For a decorative touch, add a simple border or fringe․ Baby blankets are a great way to practice larger projects and create a thoughtful gift․ Free PDF guides like Knifty Knitter offer patterns and tips to ensure success․
Common Mistakes and Troubleshooting
Common mistakes include uneven tension and dropped stitches․ To fix, check tension regularly, ensure consistent wrapping, and count stitches after each row for accuracy and proper pattern alignment․
Uneven Tension
Uneven tension is a common issue for beginners in loom knitting․ It occurs when the yarn is wrapped too tightly or too loosely around the pegs, leading to an inconsistent fabric․ To avoid this, ensure each stitch is wrapped evenly, using the same amount of yarn for each peg․ Adjusting the tension can be done by gently pulling the yarn after wrapping or by using a measuring tool to check consistency․ Practicing on a swatch before starting a project can help develop muscle memory for the right tension․ Always refer to the gauge chart in your PDF guide to ensure proper needle count and yarn weight․ Regularly checking your work and making adjustments will help maintain a consistent and professional finish․
Dropped Stitches
Dropped stitches are a common mistake in loom knitting, especially for beginners․ They occur when a stitch is accidentally left unsecured on the peg, causing it to unravel․ To fix this, stop knitting as soon as you notice the issue․ Use a crochet hook or knitting hook to carefully pick up the dropped stitch and work it back up to the current row․ Ensure the stitch is secure on the peg before continuing․ Prevent dropped stitches by keeping a steady hand, using the correct hook size, and avoiding distractions while knitting․ Regularly inspect your work to catch errors early․ Free PDF guides often include troubleshooting tips to help beginners master stitches and maintain consistency in their projects․ Always double-check your work to ensure a professional finish;

Resources for Further Learning
Explore free PDF guides like Knifty Knitter and Good Knit Kisses for step-by-step tutorials․ Join online communities and forums for tips, while video tutorials on YouTube offer visual guidance for mastering loom knitting techniques․
Free Loom Knitting PDF Guides
Free PDF guides are excellent resources for beginners․ The Knifty Knitter PDF provides detailed instructions for round, rectangular, and long looms, compatible with brands like Darice and Boye․ Good Knit Kisses offers a comprehensive 9-lesson class with 7 patterns, covering all basics․ These guides include step-by-step tutorials, clear diagrams, and projects like hats, scarves, and blankets․ They’re perfect for learning essential stitches such as the e-wrap, purl, and garter stitch․ Download these guides to start your loom knitting journey with confidence and create beautiful projects right away․ Visit websites like Loomahat or Good Knit Kisses to access these free resources․
Online Communities and Forums
Online communities and forums are invaluable for loom knitting enthusiasts․ Websites like Loomahat and Good Knit Kisses offer forums where beginners can ask questions, share tips, and learn from experienced knitters․ These platforms often feature discussions on troubleshooting common mistakes, such as uneven tension or dropped stitches․ Users also share their own patterns and modifications, providing inspiration for new projects․ For example, Denise Canela’s blog includes a comments section where readers like Helen and Kathy exchange ideas and solutions․ These communities foster a supportive environment, helping beginners to improve their skills and stay motivated․ Joining these forums can enhance your learning experience and connect you with a passionate crafting community․
Video Tutorials
Video tutorials are an excellent resource for learning loom knitting․ Platforms like YouTube offer step-by-step guides for beginners, covering techniques such as casting on, the E-wrap stitch, and binding off․ Channels like Good Knit Kisses provide comprehensive lessons, while sites like Loomahat include video links in their tutorials․ These videos often accompany free PDF patterns, such as the Knifty Knitter Instructions PDF, making it easier to follow along․ Additionally, videos demonstrate how to use specific looms, like the Knit Hook, and showcase projects like the Basic Hat Pattern․ Video tutorials are especially helpful for visual learners, allowing them to pause and rewind as they master each step․ This combination of visual and written instructions ensures a smooth learning process for beginners․
Loom knitting is easy to start with free PDF guides and video tutorials․ Begin your first project today and enjoy creating with this fun, relaxing craft!
Final Tips for Beginners
Start with simple projects like scarves or hats using free PDF patterns․ Practice tension control to avoid uneven knitting․ Use the right yarn for your project, and always read instructions carefully․ Watch video tutorials for visual guidance․ Experiment with different stitches and patterns to build confidence․ Join online communities for support and inspiration․ Don’t be afraid to make mistakes—they’re part of the learning process․ Keep your tools organized and always have a measuring tape handy․ Most importantly, enjoy the creative journey and take pride in your handmade creations․ Happy looming!
Encouragement to Start Your First Project
Starting your first loom knitting project is an exciting step! Remember, it’s okay to make mistakes—they’re part of the learning process․ Begin with a simple project like a scarf or hat using free PDF guides․ Choose a yarn you love and a pattern that suits your skill level․ Celebrate small victories, like mastering the e-wrap stitch or completing your first row․ Join online communities for support and inspiration․ Don’t hesitate to ask questions or share your progress․ The loom knitting community is welcoming and eager to help․ Most importantly, enjoy the creative journey and take pride in crafting something handmade․ Happy looming—your first project is just the beginning of a rewarding hobby!
